VPS Training
VPS Studio

Virtual Presentation Studios

Below are detailed instructions on how to use the VPS studios. Please check back often for updates.

Setup Information

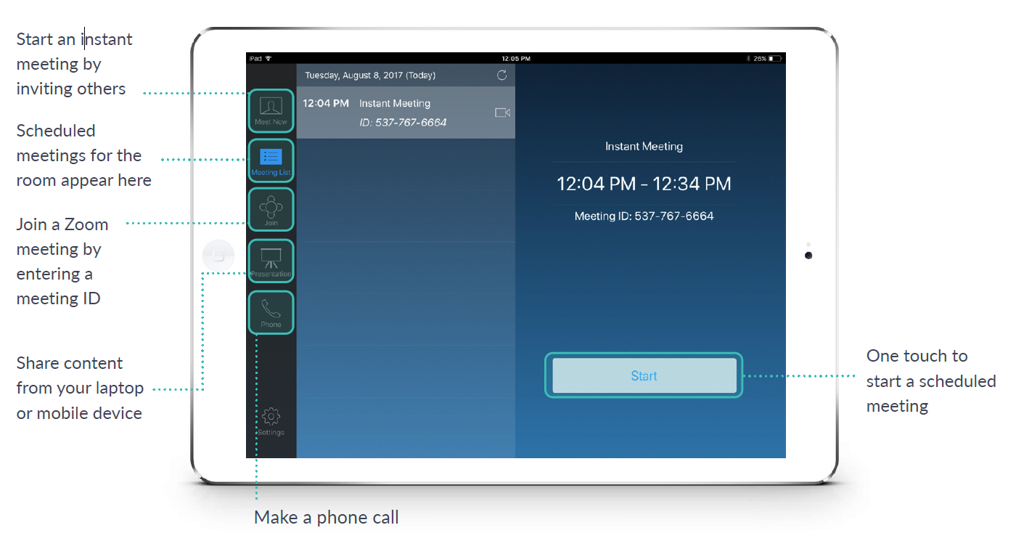
Setting up Zoom event.

  • Setup a Zoom Session using your usual Zoom Account and invite the room*, and write down the session ID (as backup)
    *Instructions to invite the room are included in this presentation
  • Write down your Zoom Session number and host key before coming to the Studio in case they are needed.
  • The host key can be found in your personal Zoom Account under Profile / Meeting.
  • Set up any additional sources you may want to use (i.e., laptop)
  • If using a personal laptop, please set the display to duplicate and not extend (F8 on PC or Windows Key + P).
  • Set your laptop to not go to sleep during the meeting.
  • If you intend to show a video, please verify the speakers on your laptop are not muted.
  • Do not sign in to Zoom from your computer unless you use polls or quizzes. If you need to, use the ‘Join from Room’ option which avoids connecting audio and video from your laptop to the meeting.
  • Sign in to Zoom desktop client.
  • Click the Meetings tab.
  • Find and select the meeting.
  • There will be an ellipsis (…) next to Schedule a meeting.
  • Mouse over the dots and Click Join from H.323/SIP Room System.
  • The desktop client will search for local Zoom Rooms. If none are detected, enter the Sharing key displayed on the Zoom Room display.
  • VPS VPS

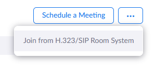
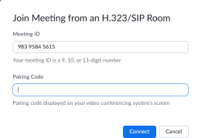
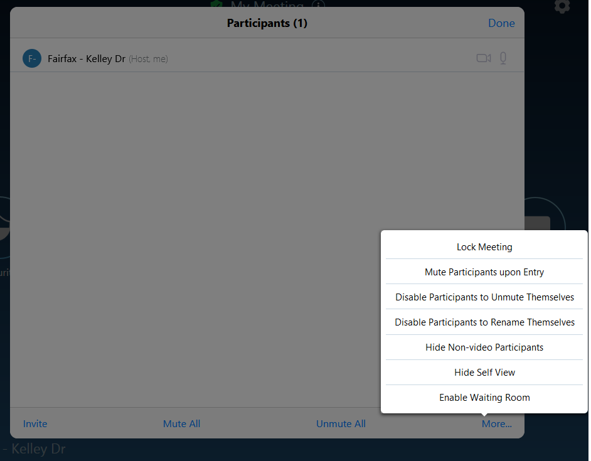
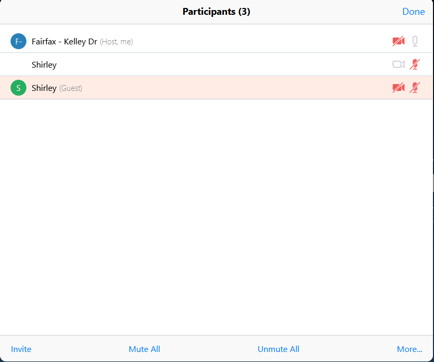
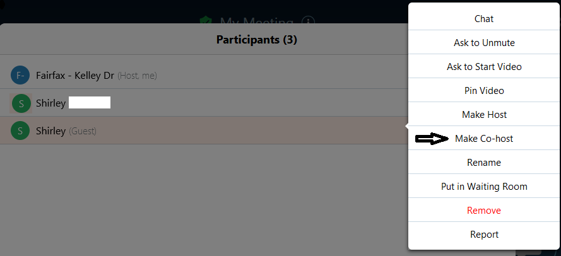
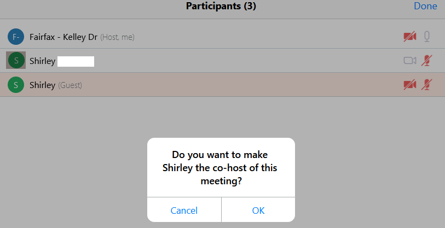
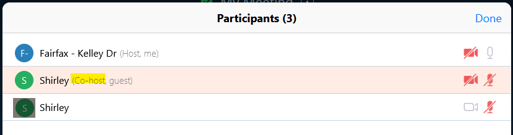
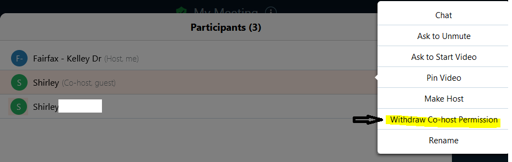
Zoom Rooms must be the host or co-host of the meeting. These are the option:

  • Zoom Rooms automatically assume host status if the host does not sign in on another system (Easiest).
  • Use the Claim Host Option – On the iPad, click on Participant, and click Claim Host (center bottom). The host key found under your Zoom profile, under meeting information.
  • If you are logged into zoom on another system, go to participants, click ‘more,’ and make the room host or co-host.

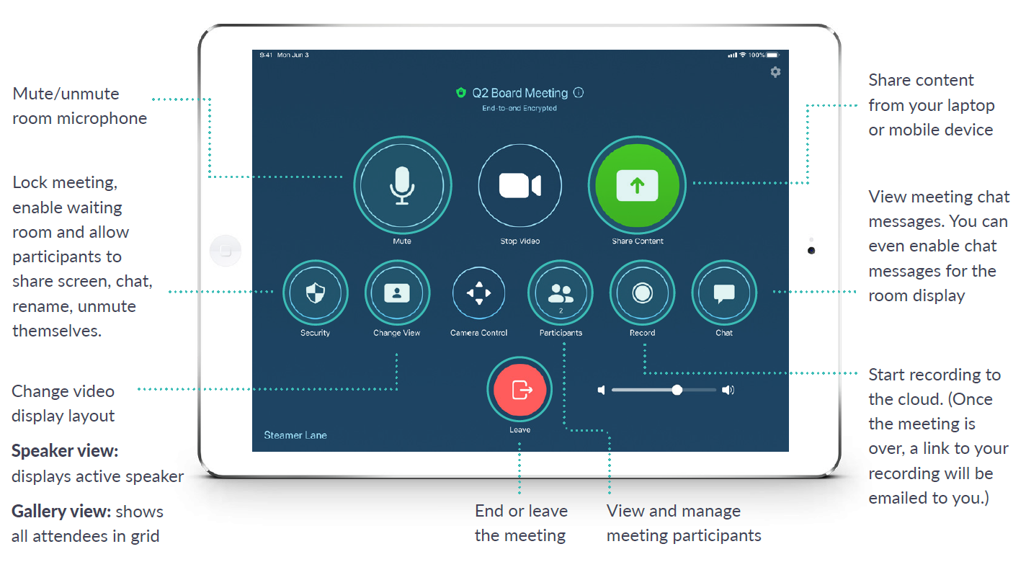
Screen Configuration – The screens will be configured as outlined below:

  • Left Monitor – Gallery View
  • Center Monitor – Active Speaker
  • Right Monitor – Shared Content
  • Note: On the iPad, there is a ‘Change View’ option that will allow you to change the view of the Left Monitor


"Invite" the Studio

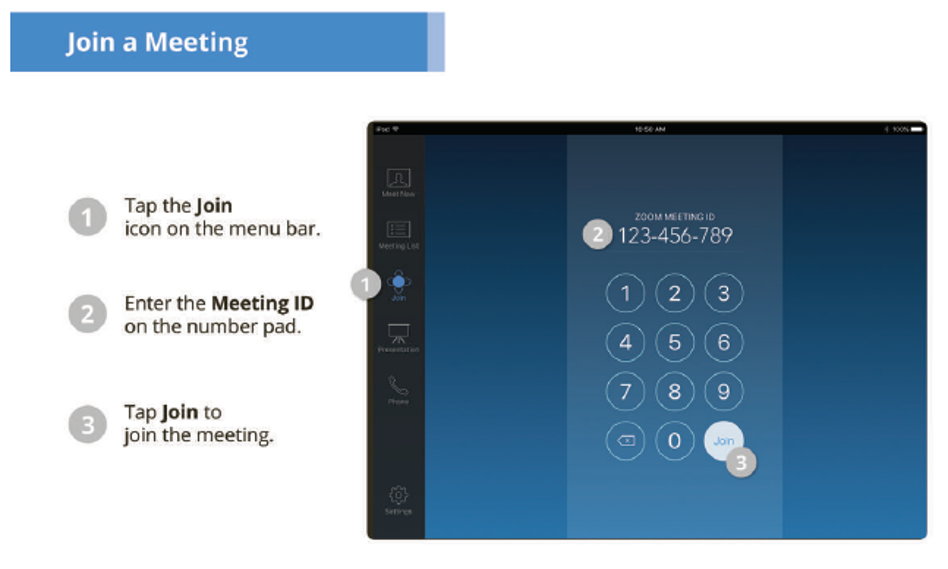
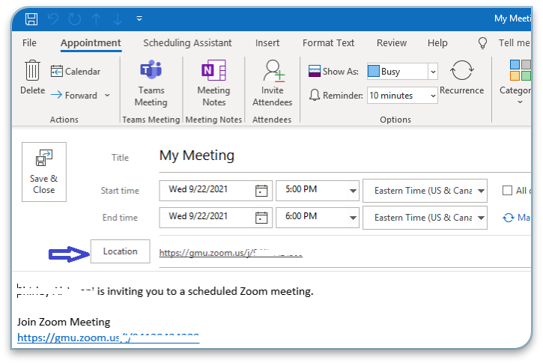
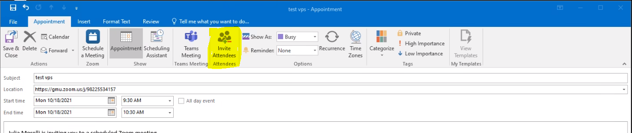
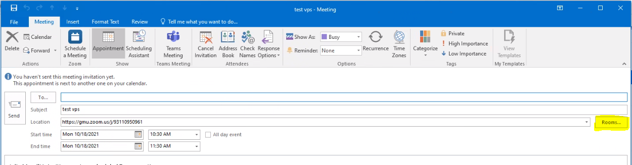
Using Outlook to schedule your meeting on the Studio Calendar

  • Log into your personal Zoom account to set up the meeting, as you normally would,
  • After saving the meeting settings, you should see an option to Add the meeting to a Calendar
  • Click on Outlook and, depending on your software version or if you have downloaded the Outlook plug-in, either you will be taken to an Outlook Meeting Invite Page or have a meeting.ics link in your downloads which you will need to click on to open the link to get to the Outlook Page.

  • In Outlook, there is a ‘Location’ link. Click Location Box.
  • VPS
  • If you don’t see the location link, then click on “Invite Attendees,” and then the link will include “Rooms” at the far right side on the same line as the location.
  • VPS VPS
  • Once the location page has opened up, go to the bottom of the list and Double click on one of the following:
    • ZR Arlington – Van Metre 722 for the Arlington Campus Studio
    • ZR Fairfax – Kelley Drive for the Fairfax Kelley Drive Studio
    • Note: you should see it in the Rooms box once you have selected it.
    VPS
  • Click Okay

  • The Studio should be listed under ‘Required’ or “To” Attendees.
  • If you are inviting others, you can do so from this page as your normally might.
  • Once you are done with the invitation, click Send and within a few minutes you will receive an acceptance of the invitation by the Zoom Studio location.
  • VPS


Starting a Meeting

VPS

  • Note: Room must have been invited to the meeting to be in the list of upcoming meetings.
  • See instructions on inviting a room via Outlook if available on your system.

Managing Participants

  • The participant will now be Co-Host and can share their screen.
    VPS
  • To withdraw Co-Host permissions, click on the participant’s name and you will see a new sub-window. Click Withdraw Co-Host Permissions. Click OK to confirm.
    VPS

Camera Controls

Sharing Content

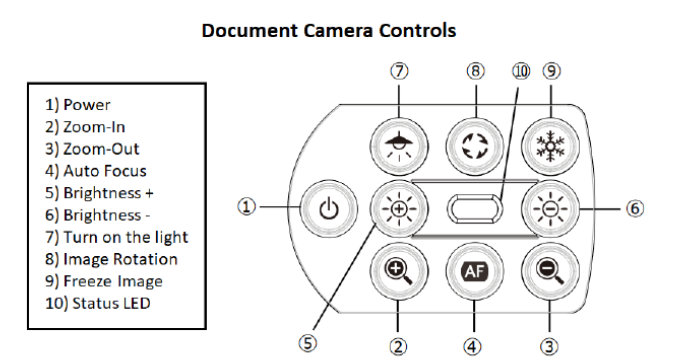
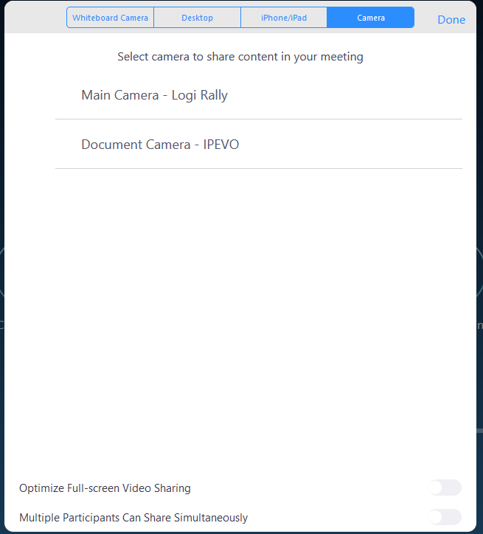
Camera, Whiteboard, Document Camera, and Laptop.

  • Options
    • Main Camera
    • Whiteboard
    • Laptop
    • Document Camera
VPS

Use this option to share the Main Camera and Document Camera

  • Click Share Content
  • Make sure Camera is highlighted
  • Chose the appropriate Camera to share.
  • Main Camera – video of presenter and room
  • Document Camera – Desktop
VPS

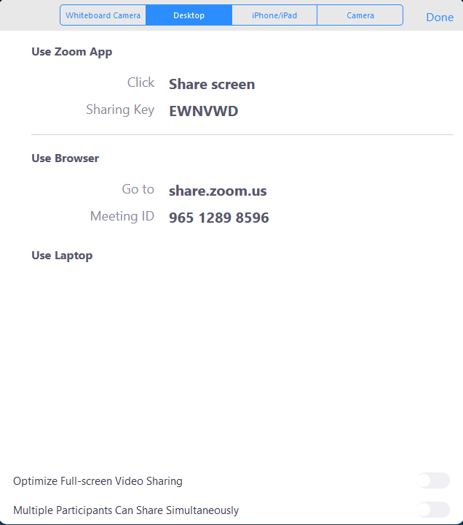
Use this option to share the Laptop (HDMI/Screen Share)

  • Click Share Content
  • Make sure Desktop is highlighted
  • Click Start Sharing under “Use Laptop” (or “Use HDMI”) VPS

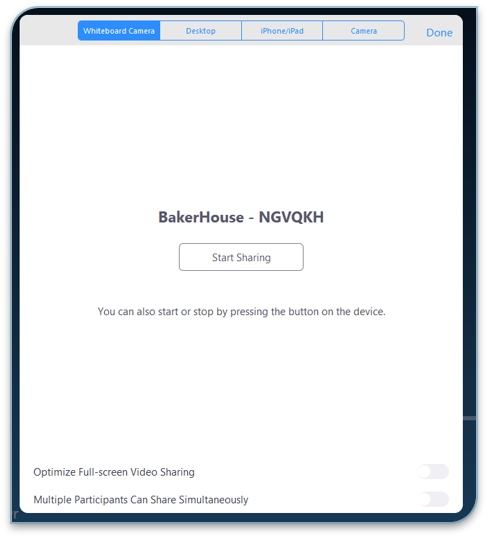
Use this option to share the Whiteboard camera

  • Click Share Content
  • Make sure Whiteboard Camera is highlighted
  • Click Start Sharing under Whiteboard Camera VPS

Breakout Rooms

  • Breakout Rooms can be setup using the iPad controller.
  • On the iPad click More (…)
  • Click Breakout Rooms.
VPS

  • Click Breakout Rooms, a new window will open
  • Click on Create breakout rooms and follow normal breakout room procedures
VPS VPS

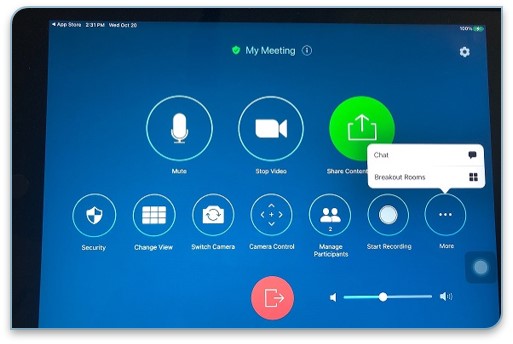
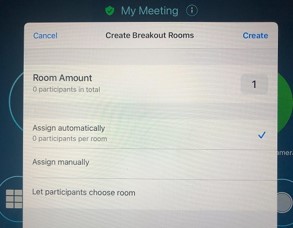
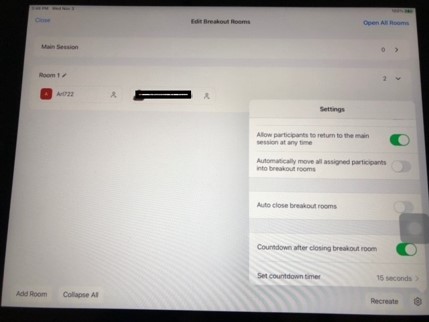
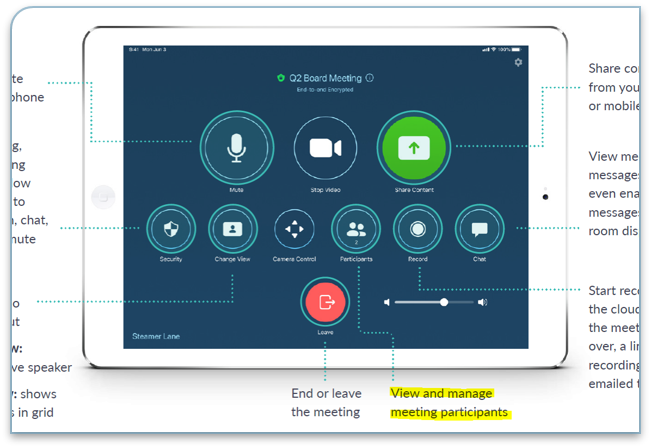
Breakout room setting can be accessed by clicking on the gear in the lower right hand corner.
VPS

Document camera controls

Ending the Meeting

  • To leave the meeting, clicking ‘End’
    • You have the option to just leave the meeting and assign host to someone else by clicking ‘Leave.’
    • You also have the option to End the Meeting for All.
VPS VPS